SAME DAY SHIPPING!
Hurry offer expires in
Pet Barrier Dog Fence Owner's Club
Welcome to the Pet Barrier Owner's Club.
This area of our website is dedicated to helping make sure you have all the information at your fingertips. We want to make it as easy as possible for you to achieve long-lasting success.
We've been assisting people with their dog fence needs since 2003 with great success, so there is not much we haven't come across. (Why not join our FaceBook Page here...)
- If you don't own a Pet Barrier yet (and are a bit overwhelmed by it all...) then it's best to request a dog fence pricing pack here...
DOWNLOAD OUR DOG FENCE MANIFEST
Our 7 Point Buyer's Guide, Plus...
5 Questions our Competitors DONT Want You to Ask
We give your dog the freedom it deserves and take away all the stress
There's a lot of options out there we know, and getting it wrong can end up costing more in the long run.
Feel free to call and chat to one of our Dog Fence Specialists to 1300 843 364.
You can also fill in the form below and tell us about your dog and property.
We will get back to you and send through our Dog Fence Buying Guide and Pricing
Discover More about the Importance of
- * Lightning and Surge Protection - Included in your warranty with an External Surge Protection Box
- * Regulated Power Supply
- * HDPe Coated Wire (Australian Made)
- * Coded Digital FM Radio Frequencies.
- * The Anti Linger Feature and Battery Life ($)
- * The Chew Warranty included on all Premium Collars
- * Reaction times and 'Anti Run Through'
- * Tri Aerial System
- * Gentle Steps Training for Success
Of course, you can call to chat at any time, and we will be adding more information as your questions come in. Check out our 'Hub Menu' for more information.
First Up... The 3 Questions we get asked the most.
Most of the good stuff is in the menu. But here are a few of the little things we get asked about dog fences.
-
How Deep do I bury the Dog Fence wire?
-
How Do I Change the Levels on the Dog Fence Collar?
-
How do I join the Boundary Wire?
1. How Deep do I bury the Dog Fence wire?
firstly... You do not need to bury our wire
As you know our wire has an HDPe Coating which gives it a 20 year UV rating. (and it's made in Australia).
Hang it on the fence wherever possible, this gives your dog a good visual and physical reference. Attach it directly to the fence. Loop it through the fence or cable tie it directly to the fence. The wire holds a radio signal, NOT electricity (so no need to 'isolate' our wire.
Attach the Dog Fence Wire directly to the fence, high enough off the ground so the rabbits can't reach it.
- Across Bush. Just leave it on the ground and add 'Expansion Loops' (bury it where ever any wildlife might travel through)
- Across Grass or lawn. Cut a split in the lawn about 5cm with a flat shovel and push the wire in. Tread on the grass to close the split.
- Across a driveway. Bring the wire UP the driveway about 1.5m to push the dog further back.
A Concrete Driveway. Pop the wire into the expansion joint and cover the dirt back over or Silicone it in. (best not to go under the concrete as the Rio can affect the signal (But you can)
A Gravel Driveway. Chip into the driveway about 15cm deep (Don't go through the compacting) Drop the wire in and cover it over. (No need to use Conduit - but you can - But it works its way to the surface faster)
- Gateways - Not too deep but if the is a lot of traffic then go deeper and bring the wire inside the gateway towards the house to compensate for the depth of the wire.
2. How Do I Change the Levels on the Dog Fence Collar?

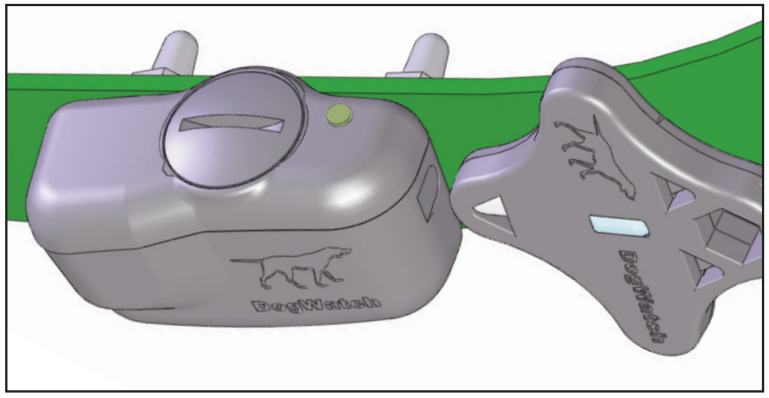
Firstly... We call it a Collar but it is actually the 'Receiver' (It is receiving and listening for the radio signal from the fence wire.
Hold the magnet end of the Multi-Tool up to the side of the Receiver Collar. Look for the 2 lines in the Top Right Corner.
- Count the Beeps... The more beeps the higher the correction level. It goes to the top level and ten it returns to level Zero.
Hold the Receiver up to the test loop on the transmitter to see it flashing and hear it beeping. You will get a much larger signal on the fence once you adjust the range/distance control
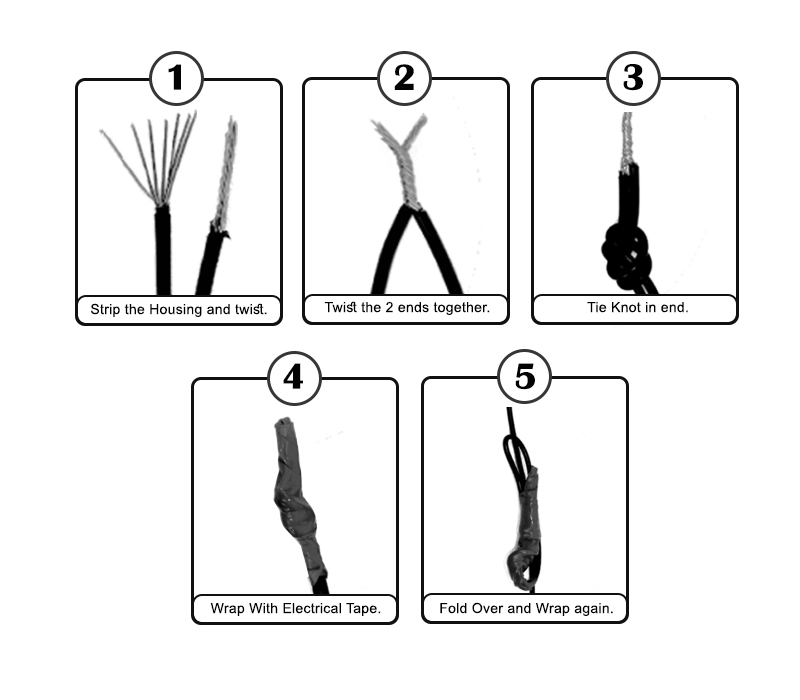
3. How do I join the Boundary Wire?
-
Strip the wire coating to expose the copper core
-
Twist the ends together to create the join - ‘butterfly twist’
-
Tie a knot close to the twist to secure the join
-
Wrap with electrical tape for added protection of the join
-
Fold it over a couple of times to create some spare slack
-
Leave extra slack around the property for joins if you get a break in the wire
Click Here to Read more about How to Join the Boundary Wire.
 The Dogline


